

Introduction
Oracle constantly introduces new Exadata Platforms providing higher performance, lower latency, extended storage, and optimized software and networking. The Exadata X9M generation is available on-premises, cloud@customer, and public cloud. AND, it comes at the same price as the previous generation!!! It is as simple as this:
higher performance + same price = reduced cost
By delivering higher performance at the same price as the previous generation, Exadata X9M enables customers to reduce the costs of running transactional workloads by up to 42 percent, and analytics workloads by up to 47 percent.
In Oracle public cloud, the commitment for an Exadata Infrastructure is 48 hours. Yes, hours, not months. So if you are running your Oracle Databases on older generations in the cloud, why not move them to X9M??? High effort? Long Downtime?
Neither of which! This blog post discusses migrating your databases to a newer Exadata generation EASILLY and with ZERO DOWNTIME.
For example, the primary database can be on X7 while the standby is on X9M. The same steps apply for migrations to the latest Exadata generation, X11M.
Data Guard with Exadata Cloud Infrastructure
Indeed, the solution is straightforward: use Oracle Data Guard.
To enable Data Guard by clicking a button via Cloud Tooling, looking at the documentation, the primary and standby databases must be in the same compartment, have identical database versions, and have both Exadata system shapes. The latest one is significant. It says, “both Exadata system shapes,” i.e., both use Exadata Cloud Infrastructure. There is no restriction on the Exadata model (X6, X7, X8, X8M, X9M, or X11M).
Let’s discuss two scenarios. As an example, we assume a migration from X7 to X9M.
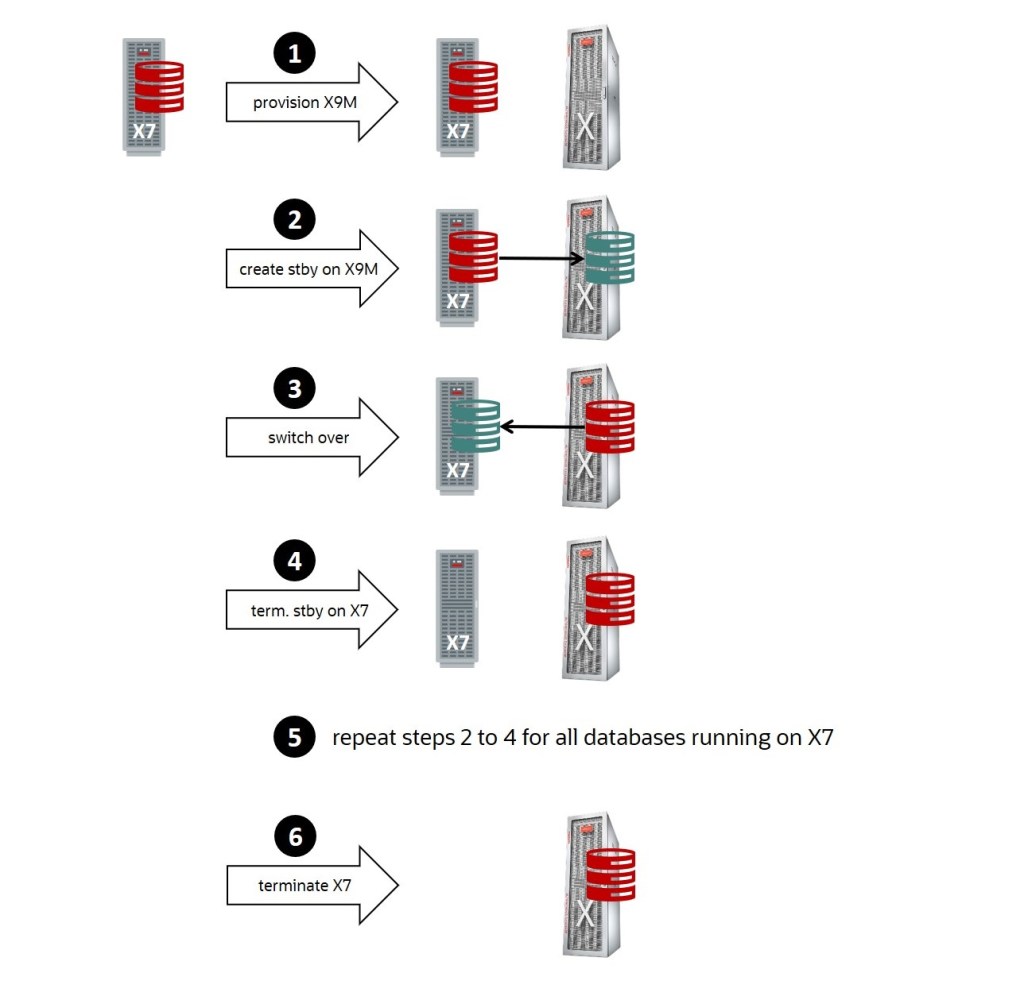
No Data Guard in place yet
If you are not using Data Guard for your database yet:
- Provision a new X9M Exadata Infrastructure.
- Enable Data Guard and choose the standby to be on the new X9M.
- Switch over! The database on the X9M becomes the primary.
- Terminate the standby (the former primary running on the older X7).
- Repeat steps 2 to 4 for all databases running on the older X7.
- Terminate the X7 Exadata Infrastructure.
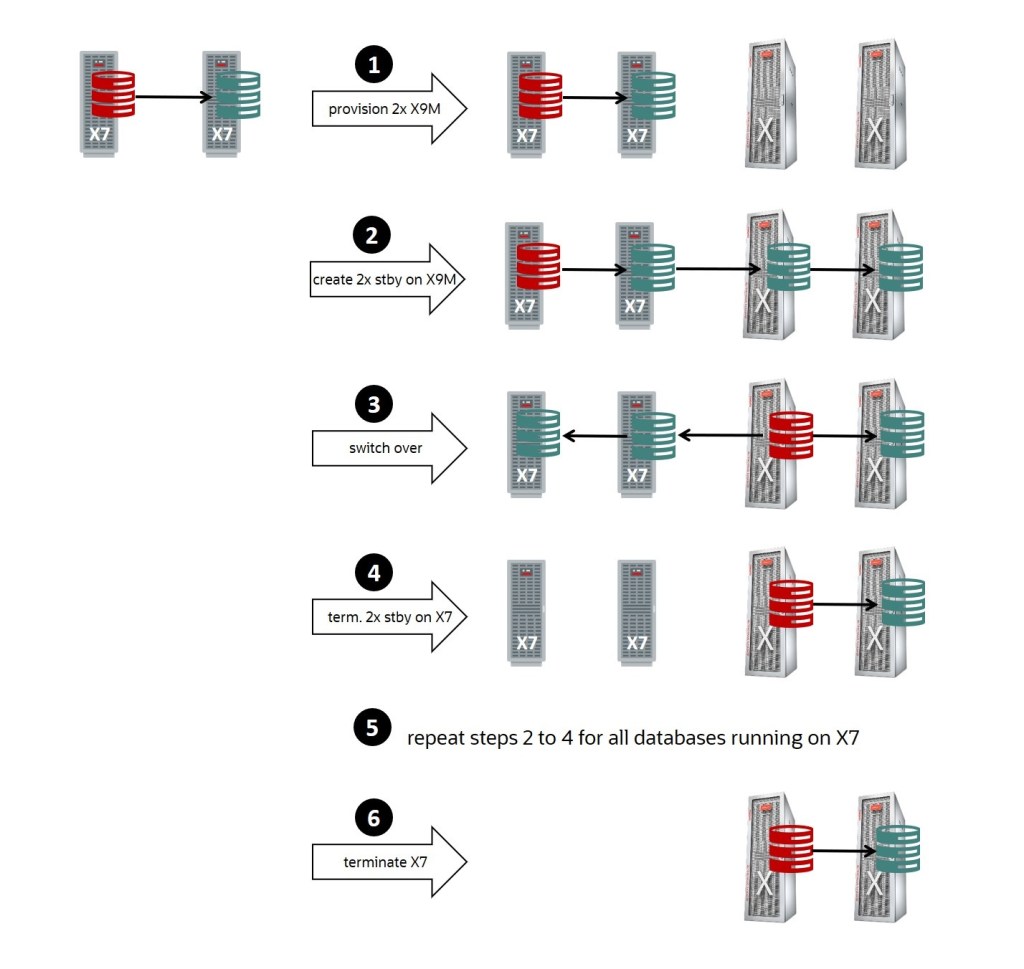
Data Guard is already in place
Update Jan 27th, 2025: Cloud Tooling now supports multiple standby databases. Hence, the steps are as follows:
- Provision two new X9M Exadata Infrastructure.
- Create a second and a third standby on the first and second X9M.
- Switch over to the standby on the first X9M! The database on the first X9M becomes the primary.
- Terminate the two standbys on the older X7.
- Repeat steps 2 to 4 for all databases running the older X7.
- Terminate the X7 Exadata Infrastructure.
Your primary database is protected by at least one standby database at all times.
Zero Downtime
During switchover, which usually takes less than a minute when appropriately tuned, neither the primary nor the standby are available, so how to reach zero downtime?
Implement (Transparent) Application Continuity and make this database downtime transparent for the application. Even for running transactions, the downtime will appear as a short brownout to the application without the need to re-connect and re-execute any statements. It’s all done automatically by Application Continuity.
Conclusion
Moving to a newer Exadata Platform enables you to benefit from the higher performance at the same cost. Oracle Data Guard makes the transition easy and with no or minimal downtime. The automation provided by Cloud Tooling simplifies the process tremendously while supporting multiple standby databases at the same time.
The Multitenant Architecture with PDB Cloning and Relocate provide further options to move your databases across environments with minimal downtime.
Further Reading
- Why you should run your Oracle Database on Oracle Cloud
- Best Practices for operating Exadata Cloud Service and Exadata Cloud@Customer
- Part 1/5: Zero Downtime Migration (ZDM) – Introduction & Installation
- How to Clone a PDB from a Standby Database in a Data Guard Environment
- How to patch Data Guard Environments on Oracle Cloud with Minimal Downtime
- Minimal Downtime Patching using Refreshable PDB Clones
- Minimal Downtime Migration and Upgrade using Refreshable PDB Clones
