

Introduction
Oracle Database@Azure became available in the US East region in December 2023. It allows you to create an Exadata infrastructure dedicated to you and run your Oracle RAC databases on it.
Oracle Database@Azure gives you more choices to run your mission-critical Oracle Databases in a Multicloud Environment. Oracle Exadata Database Service on Dedicated Infrastructure running inside Azure next to your applications offers you high availability and maximum performance and is managed via the Azure Portal and OCI Console for full operational automation.
This blog post guides you through the steps to create and manage the Exadata infrastructure and Oracle databases in the Azure Portal and OCI Console including screenshots to get you the look & feel.
Step 1: Provision the Exadata Infrastructure
In the Azure Portal, search for “Oracle” and choose “Oracle Database@Azure”. From the overview page, click on Create:

In the Basics tab, choose your subscription, resource group, name, region, and availability zone:

Click Next. In the Configuration tab, choose the number of database and storage servers you want to provision.
The minimum is 2 database and 3 storage servers. The maximum is 32 database and 64 storage servers which translates to a maximum of 4032 OCPUs and 4032 TB with the available X9M model. You can choose any number and combination of database and storage servers between the minimum and the maximum. The number of OCPUs and total storage will be automatically calculated and displayed:

Click Next. In the Maintenance tab, choose the maintenance method (rolling or non-rolling), specify a maintenance schedule, and enter the name and email address of the maintenance contact:

Click Review + create. Review the information provided and click on Create.
After successful provisioning, the Exadata Infrastructure will be listed on the Oracle Exadata Infrastructure tab:

Click on the name to see more details of the Exadata resource:

Step 2: Provision the Exadata VM Cluster
From the Exadata Infrastructure overview page, click on Exadata VM clusters in the Settings section, then click on Create VM Cluster.
In the Basics tab, fill in the information needed and click Next:

In the Configuration tab, select the number of database servers that will build the VM cluster and define the OCPU count, memory, and storage per VM:

Furthermore, choose the useable Exadata storage and select the options to create sparse snapshots and local backups if needed. Depending on the selected options, the storage allocation for DATA, RECO, and SPARSE disk groups will be adjusted:

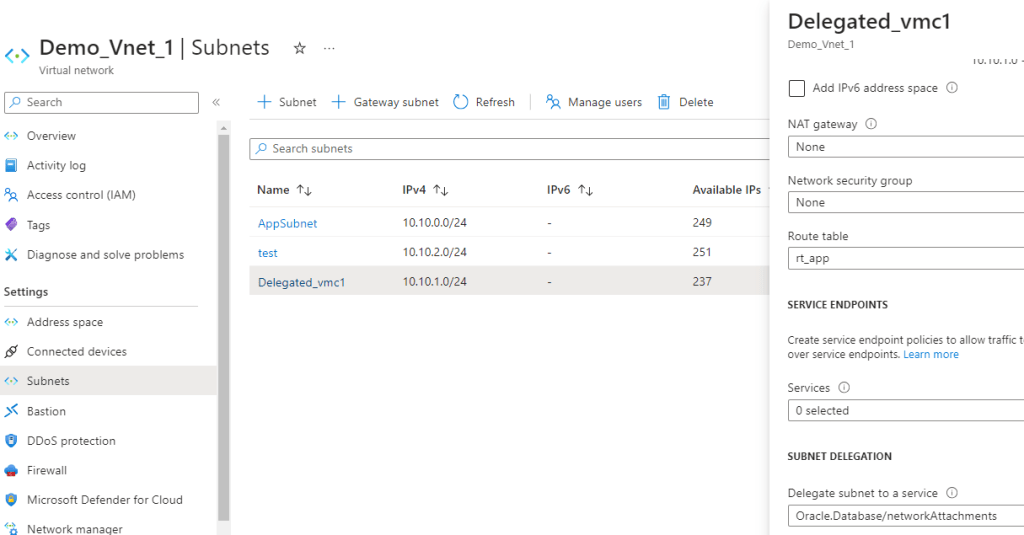
Click Next. In the Networking tab, Choose the VNet and the client subnet. The client subnet is the delegated subnet to the Oracle Database@Azure network attachment. A client subnet with the same CIDR range will be created in OCI.
You can provide a specific CIDR range for the backup subnet. If not provided, the default 192.168.252.0/22 subnet will be created in OCI.
You have the option to use a private DNS service. Enter a hostname prefix for the Exadata VM machines and click Review + create:

You need to delegate the subnet beforehand from the subnet page:
Review the information provided and click on Create.
After successful provisioning, the Exadata VM Cluster will be listed in the Exadata VM clusters section.
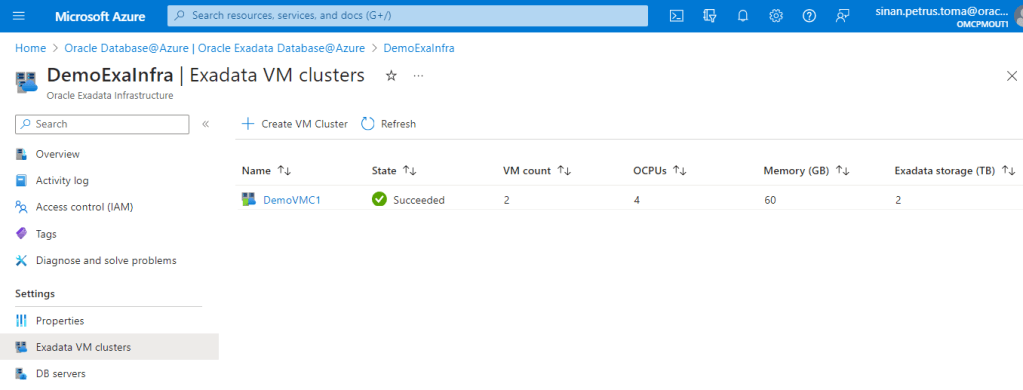
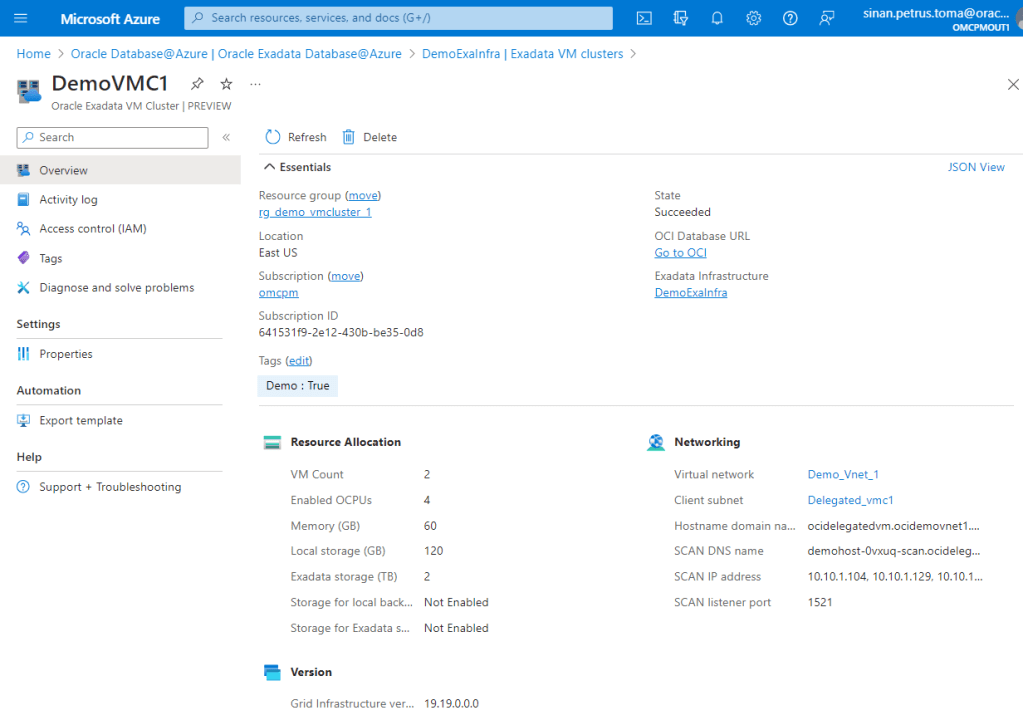
Click on the VM Cluster name to see more details of the resource:
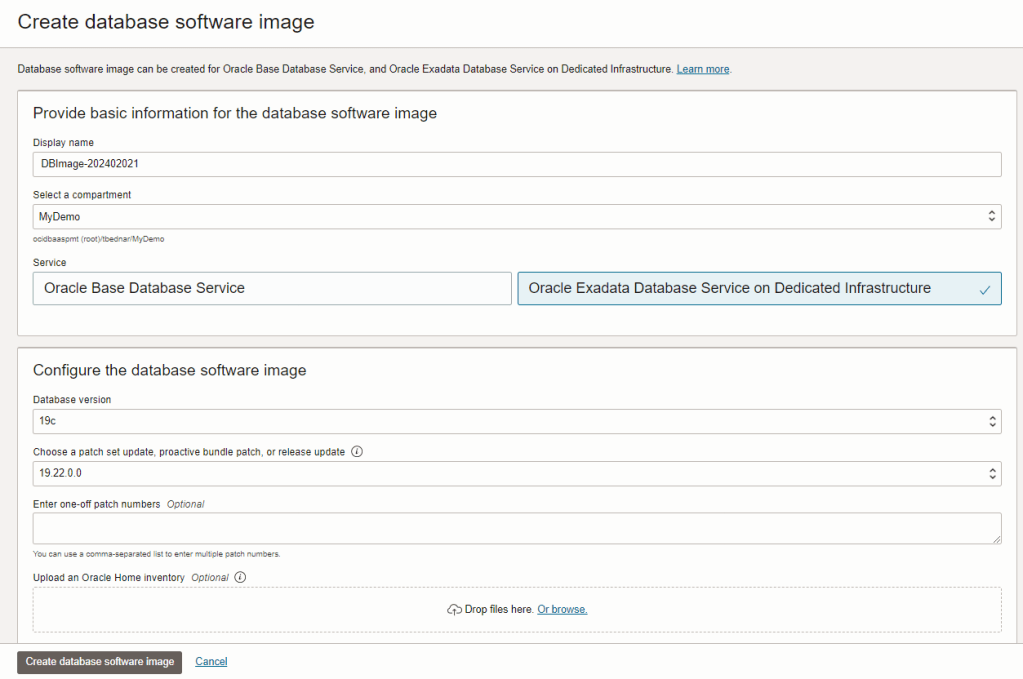
Step 3: Create a Custom Database Software Image
From the VM Cluster overview page, click on the OCI Database URL “Go to OCI” on the top-right side. You will be forwarded to the Exadata VM Cluster Details page in the Oracle Cloud Console:
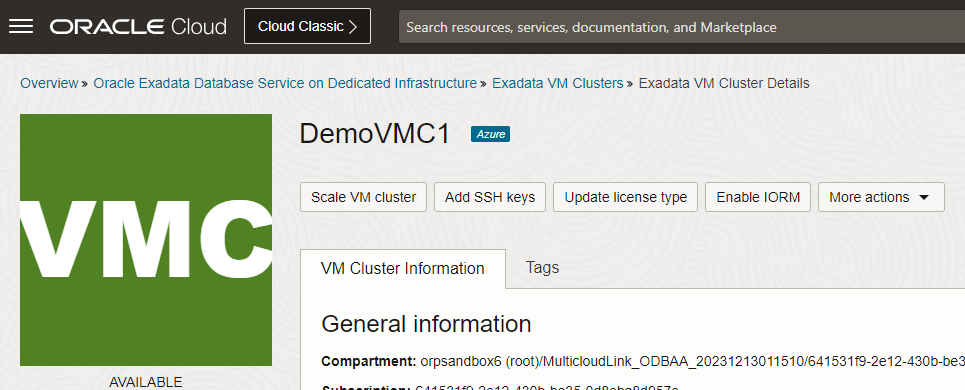
Click on the Oracle Exadata Database Service on Dedicated Infrastructure link, then on Database software images in the Resources section:

Click on the Create database software image button. Enter the required information and create the image:
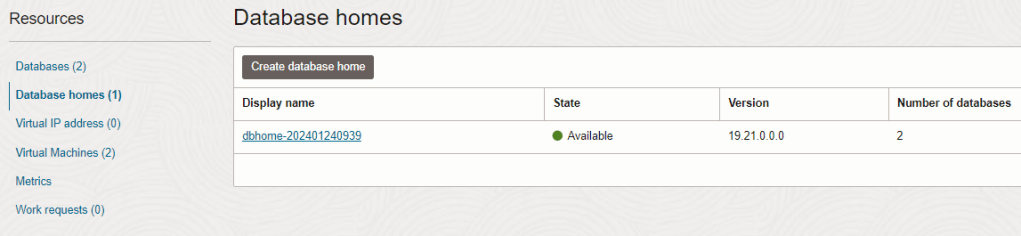
Step 4: Create a Database Home
From the Exadata VM Cluster Details page, click on the Database homes link in the Resources section, then on the Create database home button:
The Oracle-provided Software image for 19c is selected by default. Click on the Change database image button. Choose Custom Database Software Images, select the image created in step 4, and create the database home:

Step 5: Create an Oracle Database
From the Exadata VM Cluster Details page, click on the Databases link in the Resources section, then on the Create database button:
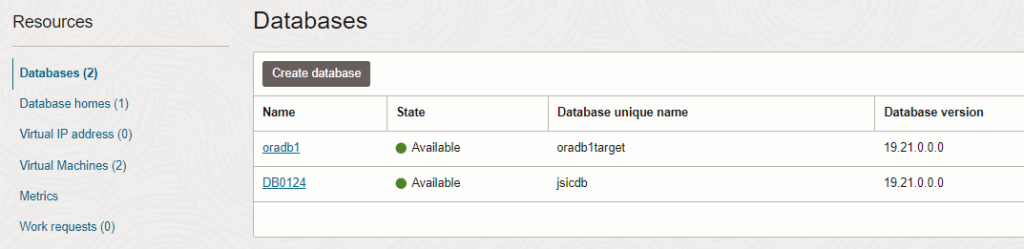
Fill in the information required, choose the database home created in step 5, and create the database:

Operational Tasks
You can execute the following operational tasks from the Azure Portal:
- Create and delete the Exadata Infrastructure.
- Create and delete the Exadata VM Cluster.
All other operations for Exadata Infrastructure and Exadata VM cluster can be performed from the OCI Console. All database-related operations are performed from the OCI Console.
Conclusion
Oracle Exadata Database Service on Dedicated Infrastructure running inside Azure enables you to run your applications and Oracle RAC databases on Exadata in the same physical data center to achieve high availability, the lowest latency, and the best performance.
The Exadata Infrastructure and the Exadata VM Cluster are created from the Azure Portal while the Oracle Databases are created from the OCI Console.
