

Update October 2023: For Oracle Linux 8, have a look at OCIFS and install the OCIFS Utility documentation.
Introduction
Mounting an Object Storage bucket as a local file system simplifies file management and provides you with additional cost-efficient storage space that can be used as if it were on the local server. Once the bucket is mounted, you simply access, add, and remove any files in the local folder, and the changes will immediately be synchronized with the Object Storage bucket and vice versa.
For migrations of large databases, you might not have sufficient storage space on the local file system for your backups or data pump export files. For backups, you can use the Cloud Backup Module to restore directly from Object Storage. Importing data pump dump files directly from Object Storage is also supported from database version 19.12 onward. However, you will need to install the DBMS_CLOUD package beforehand. Alternatively, put your dump files on Object Storage and mount it as a file system via s3fs-fuse as described in this blog post. Keep in mind, a permanent installation of s3fs-fuse might impact OS patching for Base Database and ExaDB-D systems. Make sure to uninstall it after completing the migration.
The Environment
- VM running Oracle Linux 7 in the Frankfurt region.
- Object Storage bucket in London region named Bucket_LHR using the standard storage tier.
I chose this configuration to show that the bucket does not need to be in the same OCI region as the VM machine.
Step 1: Install s3fs-fuse
s3fs-fuse is a tool that enables you to mount an S3 bucket via a Filesystem in USErspace (FUSE). The easiest way for installation is to use a prebuilt package from the Oracle Linux EPEL repository:
[opc@hostad2 ~]$ sudo yum install s3fs-fuse -y
Loaded plugins: versionlock
There are no enabled repos.
 Run "yum repolist all" to see the repos you have.
 To enable custom repositories:
     yum-config-manager --enable <repo>
To solve this issue:
1. (optional) Disable the yum plugin version lock by setting enabled=0 in the /etc/yum/pluginconf.d/versionlock.conf file:
[opc@hostad2 ~]$ sudo vi /etc/yum/pluginconf.d/versionlock.conf

enabled = 0
2. Add Oracle EPEL Repository. Add the following sections to the /etc/yum.repos.d/ol7.repo file. If the file does not exist, create it:
[opc@hostad2 ~]$ sudo vi /etc/yum.repos.d/ol7.repo

[ol7_latest]
name=Oracle Linux $releasever Latest ($basearch)
baseurl=http://yum-fra.oracle.com/repo/OracleLinux/OL7/latest/$basearch/
gpgkey=file:///etc/pki/rpm-gpg/RPM-GPG-KEY-oracle
gpgcheck=1
enabled=1

[ol7_epel]
name=Oracle Linux $releasever EPEL ($basearch)
baseurl=http://yum.oracle.com/repo/OracleLinux/OL7/developer_EPEL/$basearch/
gpgkey=file:///etc/pki/rpm-gpg/RPM-GPG-KEY-oracle
gpgcheck=1
enabled=1
Try again:
[opc@hostad2 ~]$ sudo yum install s3fs-fuse -y
...
Complete!
Hurra!
Alternative Installation Option
You also can get and install s3fs-fuse from GitHub:
sudo yum install automake fuse fuse-devel gcc-c++ git libcurl-devel libxml2-devel make openssl-devel
git clone https://github.com/s3fs-fuse/s3fs-fuse.git
cd s3fs-fuse
./autogen.sh
./configure
make
sudo make install
Step 2: Create Customer Secret Keys
In the OCI Console, click on the profile icon on the top right of the page, then on your user name.

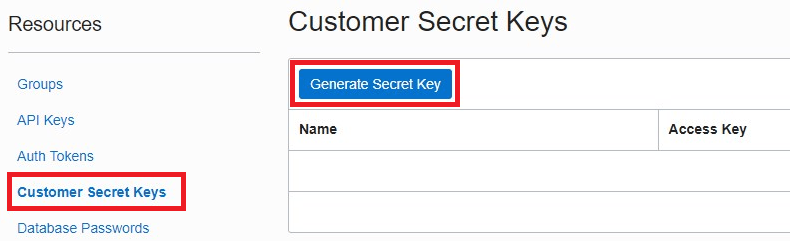
In the Resources list, click on Customer Secret Keys, then on the Generate Secret Key button:
Enter a name of your choice and click Generate Secret Key:

Copy the generated Secret Key:

Secret Key is: N8G9jv06+EobLiHmiiG2WqW8tbSE3I779L5NZFbHfdI=
Now a Secret Key is listed. We also need to copy the Access Key:

Access Key is: de007dd7b498d3e51a801e63353ca1aa567baf3e
These keys are deleted by the time of publishing the blog post 😉
Step 3: Create a Password File
Create a password file that contains your Secret Key and Access Key from the previous step, both in one line, separated by a colon:
## add ACCESS_KEY:SECRET_KEY to .passwd-s3fs file
[opc@hostad1 ~]$ vi .passwd-s3fs
de007dd7b498d3e51a801e63353ca1aa567baf3e:N8G9jv06+EobLiHmiiG2WqW8tbSE3I779L5NZFbHfdI=
[opc@hostad1 ~]$ chmod 600 .passwd-s3fs
Step 4: Mount the Object Storage bucket as File System
Finally, it’s time to mount the bucket as a local file system:
## sudo s3fs <bucket_name> <local_path> -o endpoint=<oci_region_name> -o passwd_file=.passwd-s3fs -o url=https://<object_storage_namespace>.compat.objectstorage.<oci_region_name>.oraclecloud.com/ -onomultipart -o use_path_request_style
[opc@hostad1 ~]$ mkdir /home/opc/my_bucket_content/
[opc@hostad1 ~]$ sudo s3fs Bucket_LHR /home/opc/my_bucket_content/ -o endpoint=uk-london-1 -o passwd_file=.passwd-s3fs -o url=https://mynamespace.compat.objectstorage.uk-london-1.oraclecloud.com/ -onomultipart -o use_path_request_style -o allow_other
Check the mount point:
[opc@hostad1 ~]$ mount | grep s3fs
s3fs on /home/opc/my_bucket_content type fuse.s3fs (rw,nosuid,nodev,relatime,user_id=0,group_id=0,allow_other)
Looks great!
Step 5: Add and Remove Files
Time for testing!
Create a file on the local file system:
[opc@hostad1 ~]$ touch /home/opc/my_bucket_content/test.txt
And here it is in the Object Storage bucket:

Step 6: (optional) Remove the Mount Point
If you needed the mount point for a temporary task only, remove it when you are done:
[opc@hostad1 ~]$ sudo fusermount -u /home/opc/my_bucket_content/
Conclusion
Installing s3fs-fuse might become a hassle if you don’t have the right yum repos, missing packages, etc. Once s3fs-fuse is installed, mounting the bucket is an easy task.
Mounting an Object Storage bucket as a local file system simplifies file management tremendously when adding and removing files in Object Storage buckets. It also simplifies data pump import from dump files residing on Object Storage. For Base Database and ExaDB-D systems, the installation might have an impact on Cloud Tooling while patching the operating system. You can still use s3fs-fuse temporarily for the duration of your migrations.
Further Reading
- Import your Data directly from Object Storage in Oracle Database 21.3 and 19.12
- Oracle Cloud Infrastructure – How to Mount an ObjectStorage Bucket as Filesystem in Oracle Linux 7 (Doc ID 2577407.1)
- Mounting an Object Storage Bucket as File System on Oracle Linux
- Configuring Your System to Install Software from Oracle Linux Yum Server
